Unleash the Full Potential of Azure Pipelines at Zero Cost with Your Own Self-Hosted Agent: A Comprehensive and Easy-to-Follow Guide

Empower your development workflow with Azure Pipelines, a versatile tool that enables seamless building, testing, and deployment across platforms. Dive into our comprehensive guide to harnessing the full potential of Azure Pipelines for free, using a self-hosted agent.
Self Hosted Agent
Introduction :
Embark on a journey to optimize your development workflow with Azure Pipelines, a powerful tool designed to simplify building, testing, and deployment tasks. This comprehensive guide illuminates the path to leveraging Azure Pipelines for free, utilizing a self-hosted agent to unlock unparalleled control and efficiency in your development pipelines.
Step 1 : Set up your Azure DevOps account for seamless collaboration and project management
a) Navigate to [Azure DevOps](https://azure.microsoft.com/en-in/services/devops/) and click on “Start free” or “Start free with GitHub”. Proceed by logging in with your Microsoft Account or creating a new one to begin your journey.
b) After logging in to the portal, you’ll be greeted with a user-friendly interface like this.
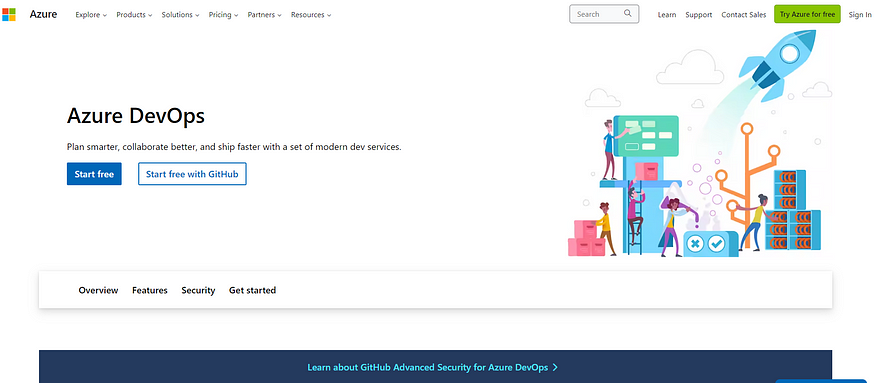
Azure DevOps Account
Step 2 : Rev Up Your Azure DevOps: Launch a New Organization and Accelerate Your Application’s Journey!
a) Choose your default directory by clicking on your Microsoft account (highlighted by the red arrow), then select the default directory. If no previous organization exists, create a new organization to proceed.
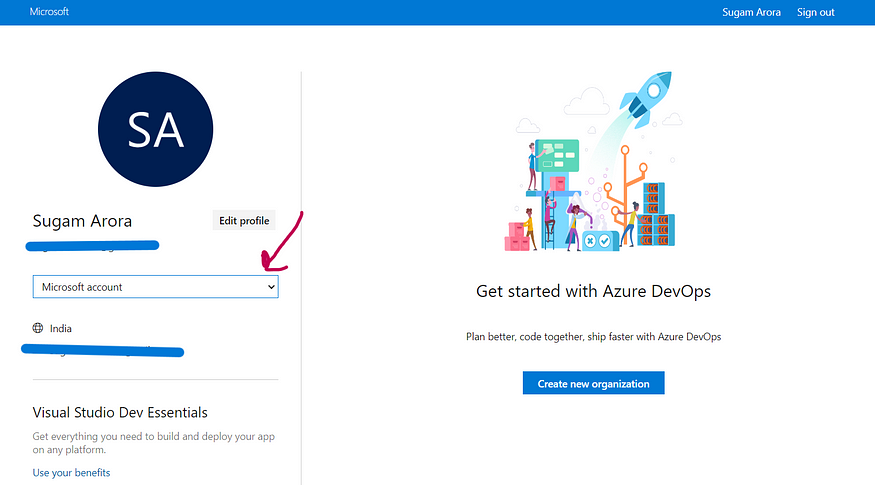
Azure DevOps Portal
b) After creating your organization, if you don’t have any projects yet, select “New Project” from the top right corner (as indicated by the arrow). This action will prompt you to create a new project.
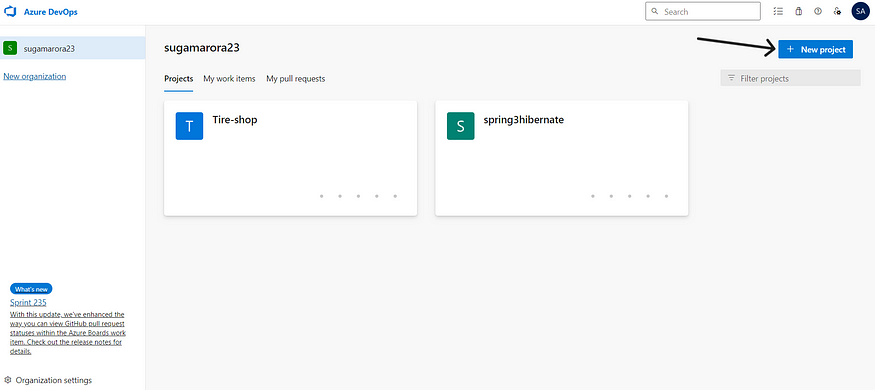
DevOps Project
c) Enter a suitable name and description for your project, then click on “Create”. Your project will be successfully created.
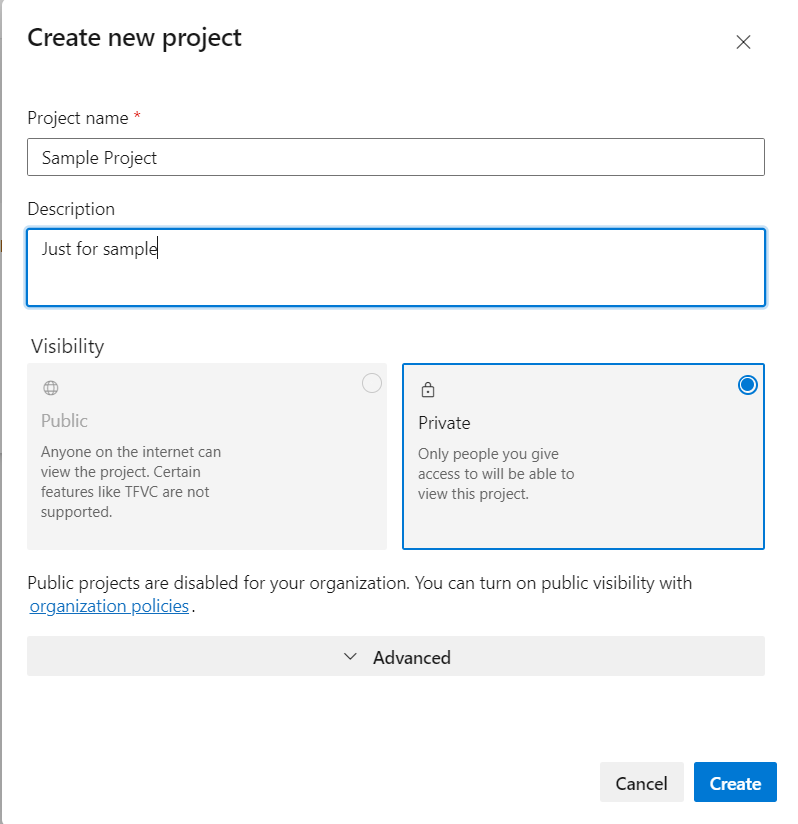
Create Project
d) Congratulations on the successful creation of your project! Your journey to innovation and collaboration begins now.
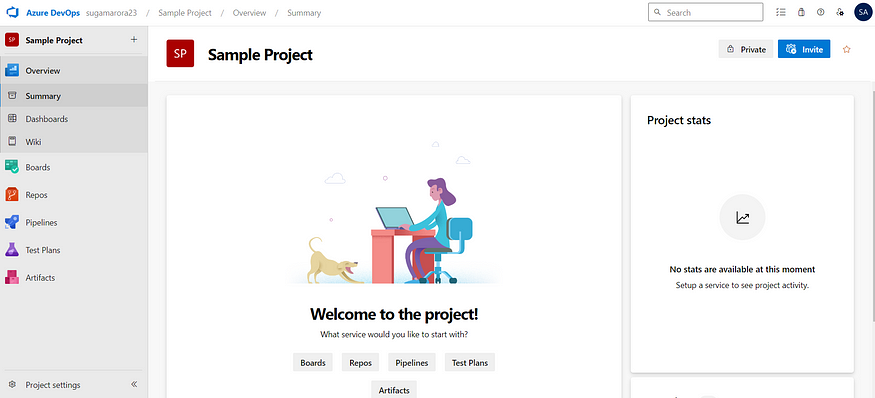
Sample Project
Step 3 : Empower Your Workflow: Setting Up a Self-Hosted Agent
a) Step into the realm of customization and control by setting up a self-hosted agent in your Azure DevOps project. Begin by navigating to your project and accessing “Project Settings” on the left side of the page.
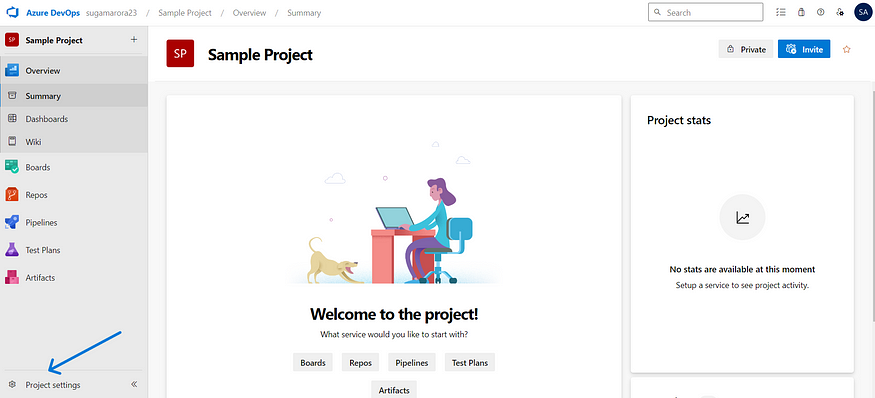
Project Settings
b) From there, venture into “Agent Pools” under “Pipelines,” and with a decisive click on “Add pool,” you’re on your way.
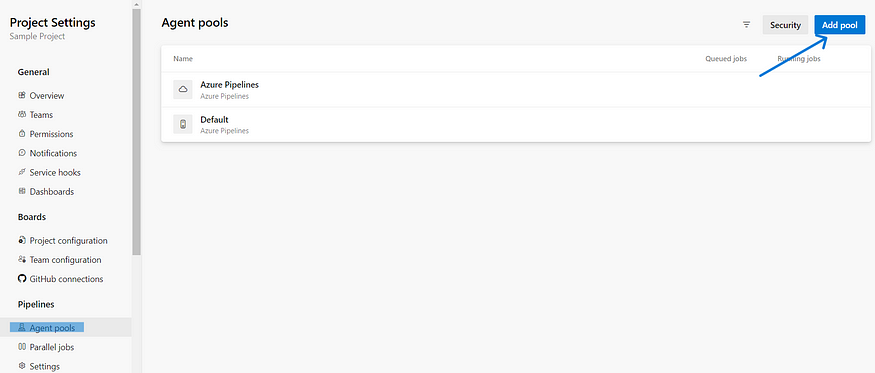
Agent Pools
c) Embrace autonomy as you select “Self-hosted” as the Pool type, christen it with a name that resonates with your vision, and with a final click on “Create,” watch your tailored agent pool come to life, ready to supercharge your workflows.
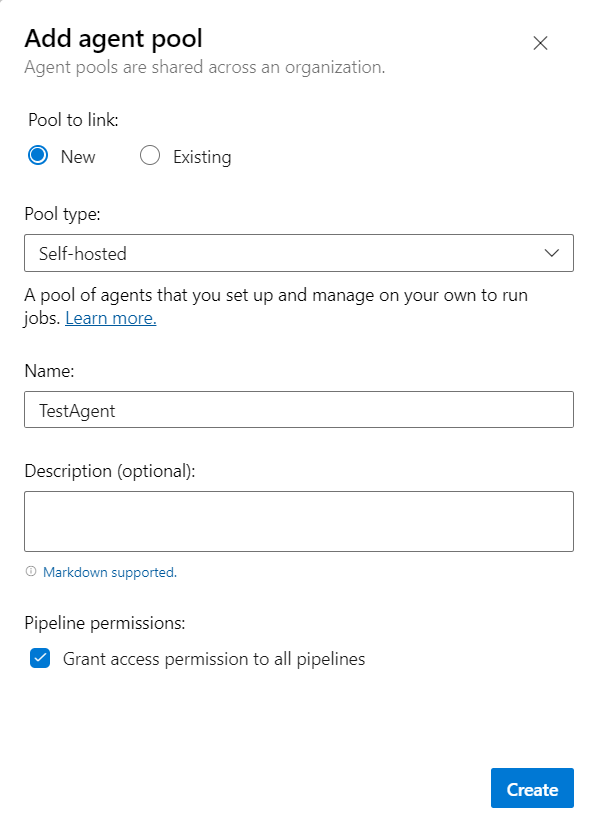
Self Hosted Agent
d) Click on “New agent” to initiate the setup process, which will unveil the screen below. Simply follow the intuitive steps to create the agent on your EC2 Instance, seamlessly integrating it into your development environment.

TestAgent
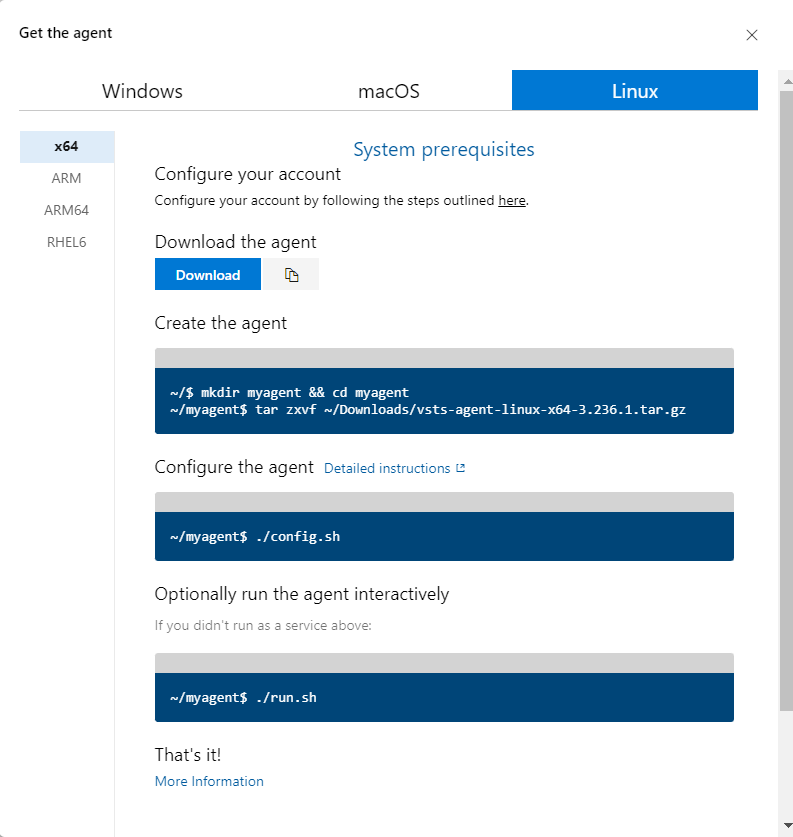
Steps to get the agent for Linux
e) To configure your setup, you’ll need to create a Personal Access Token (PAT). Simply navigate to the “Personal Access Tokens” page to get started.
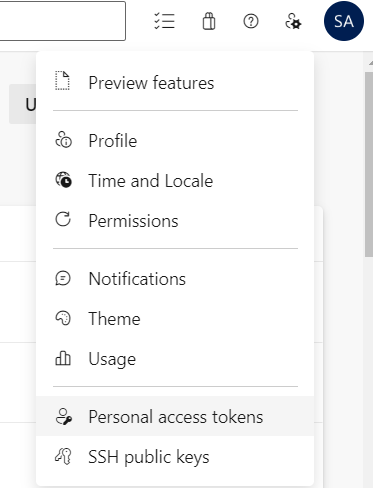
Personal Access Tokens
f) Next, select “New Token” to begin the process of creating your Personal Access Token (PAT).

g) Provide a suitable name for your token and grant it full access scope to ensure comprehensive functionality.
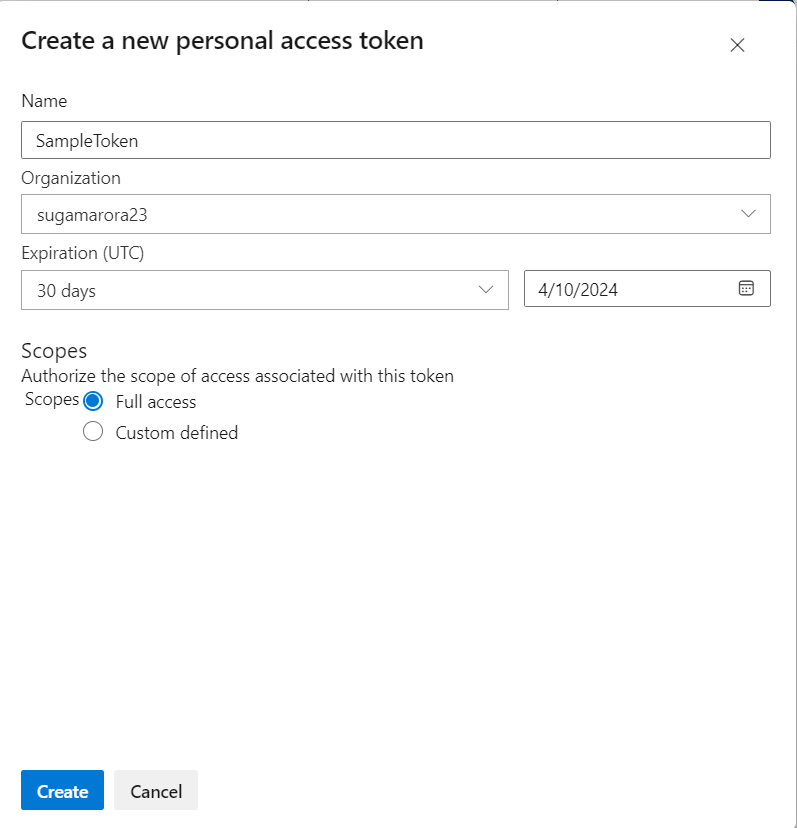
h) After clicking the “Create” button, you’ll be directed to another screen where your PAT token will be displayed. Simply copy this token. Please note that the token will be shown only once for security reasons, so ensure you save it securely.
Step 4 : Return to Your EC2 Instance’s SSH Terminal
a) Proceed to the terminal and execute the necessary configurations. Enter the server URL and the previously saved Personal Access Token (PAT) when prompted.
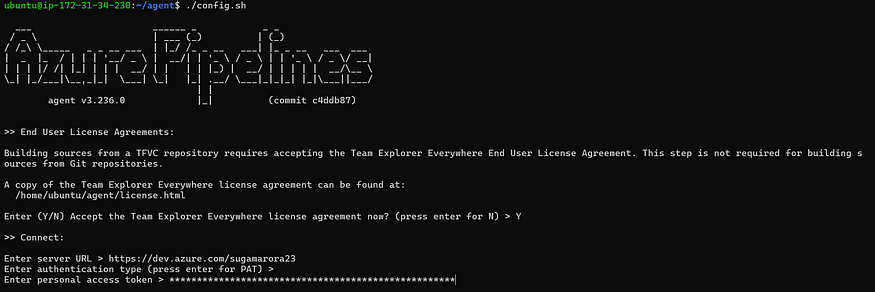
Configurations
b) Specify the name of the agent pool created earlier, as well as the name for the new agent.

Register Agent
c) Despite completing the configuration, the agent remains offline.

TestAgent
d) To resolve this, execute the specified script to ensure the agent comes online.

Agent run
e) Congratulations on successfully bringing your agent online! Your agent is now up and running smoothly, ready to enhance your development workflows and boost productivity.

Online agent
To learn more about self-hosted agents, refer to the following links:
[Azure DevOps Agents Overview](https://learn.microsoft.com/en-us/azure/devops/pipelines/agents/agents?view=azure-devops&tabs=yaml%2Cbrowser)
[Azure DevOps Linux Agent](https://learn.microsoft.com/en-us/azure/devops/pipelines/agents/linux-agent?view=azure-devops)
Conclusion :
The successful setup and configuration of our self-hosted agent mark a significant milestone in optimizing our development environment. With our agent now online and operational, we have the power to enhance collaboration, streamline workflows, and accelerate project delivery. This achievement underscores our commitment to excellence and innovation in Azure DevOps. As we continue on our development journey, may our agent serve as a reliable ally, empowering us to achieve our goals with efficiency and precision.
Thank you for taking the time to read my blog. Your feedback is immensely valuable to me. Please feel free to share your thoughts and suggestions.
