ChefCraft: Crafting a Seamless AWS EC2 Experience with Chef Recipes and Cookbooks

In the ever-evolving landscape of cloud computing, managing and automating infrastructure has become a cornerstone of efficiency. Chef, a powerful configuration management tool, offers a robust solution for orchestrating servers and applications in a scalable and reliable manner. In this comprehensive guide, we will delve into the intricacies of setting up Chef on an Amazon EC2 instance running Amazon Linux. From the basics of installation to the creation of intricate recipes and cookbooks, we will explore how Chef can streamline your deployment processes and empower your infrastructure management. Join us on this journey as we unlock the full potential of Chef and transform the way you manage your AWS environment.
Installing Chef on EC2 Instance
Installing Chef on your EC2 instance is a crucial step towards automating and managing your infrastructure effectively. Chef’s powerful configuration management capabilities can help streamline deployment processes, ensure consistency across your environment, and simplify complex tasks. In this guide, we’ll walk you through the process of setting up Chef on your EC2 instance, empowering you to efficiently manage your AWS environment
Requirements:
Amazon Linux Machine
Instance type : t2.micro
Root volume : 8gb
Port : 22 and 80
To enhance the security and functionality of your EC2 instance, begin by establishing an SSH connection:
ssh -i your-key.pem ec2-user@your-instance-ip
Once connected, elevate your permissions to the root user:
sudo su
With administrative privileges, update all available packages:
yum update -y
These steps ensure your system remains up-to-date with the latest security patches and improvements.
To begin your Chef journey, retrieve the workstation package with wget and then install it using yum for seamless integration:
wget https://packages.chef.io/files/stable/chef-workstation/20.7.96/el/7/chef-workstation-20.7.96-1.el7.x86_64.rpm
yum install chef-workstation-20.7.96-1.el7.x86_64.rpm
Prepare to unleash the full potential of Chef on your system.

Chef Package
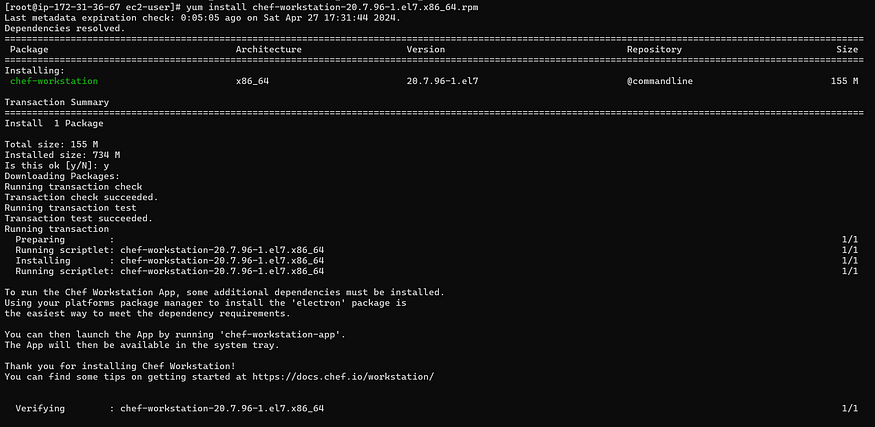
Installing Chef
To check if Chef is installed, you can use the which command, which will show the path to the Chef executable if it’s installed:
which chef
If Chef is installed, this command will display the path to the Chef executable. If it’s not installed, it won’t return anything.
To check the version of Chef installed on your system, you can use the following command:
chef --version
This will display the version number of the Chef Workstation that is currently installed on your machine.

Note: If you encounter an error related to libxcrypt-compat when installing Chef Workstation, use the following command to install the necessary package:
sudo yum install -y libxcrypt-compat
This package provides compatibility libraries for applications that depend on the older libxcrypt library.
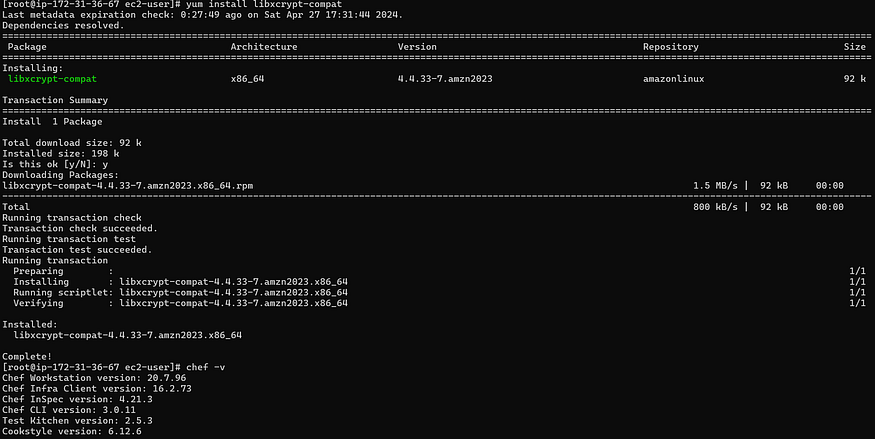
Libxcrypt-compat installation
Creating and Applying Cookbooks and Recipes in Chef
Create a directory named cookbooks:
mkdir cookbooks
Check if the cookbooks directory was created:
ls
Change into the cookbooks directory:
cd cookbooks/
Generate a new cookbook using Chef:
chef generate cookbook my_cookbook
Replace my_cookbook with the desired name for your cookbook(I have changed it to first)
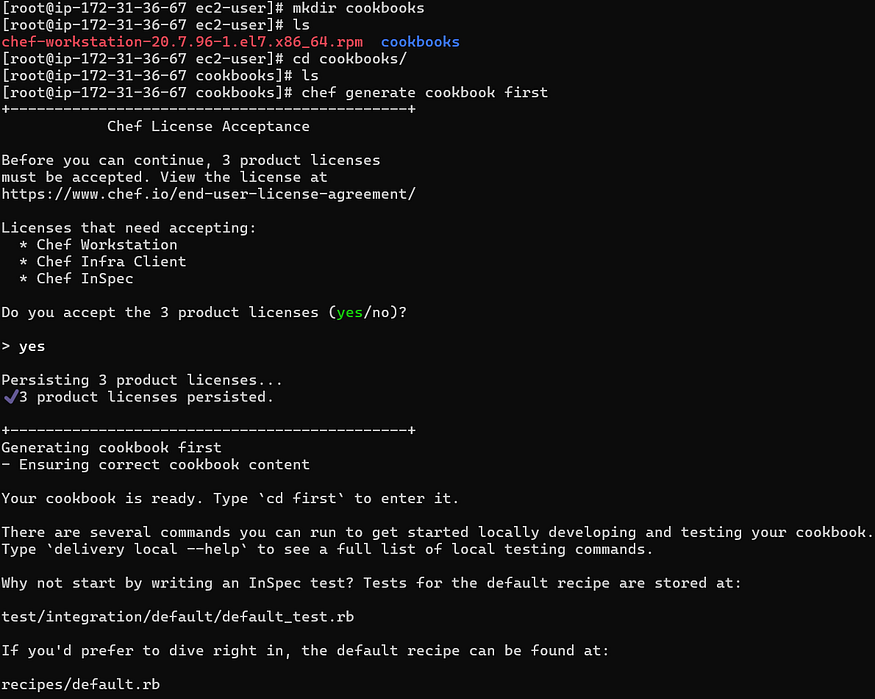
Creating Cookbook
To check the contents of the cookbooks directory and the my_cookbook directory within it, you can use the tree command. However, if the tree command is not installed, you can install it using sudo yum install tree. Once installed, you can use the following command:
tree cookbooks/
This will display a tree-like structure of the contents of the cookbooks directory, showing the first directory and its contents.
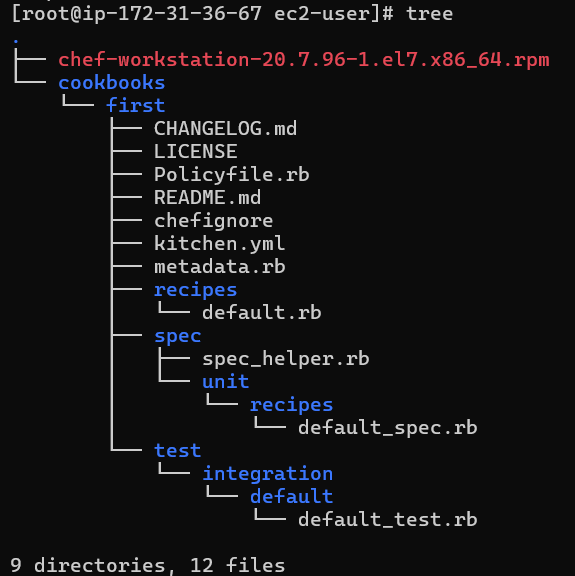
Tree for Cookbook
To create a recipe named first-recipe inside your first cookbook, you can follow these steps:
Change into the directory of your cookbook (`first`):
cd first/
Generate a new recipe named first-recipe:
chef generate recipe first-recipe
This will create a new file named first-recipe.rb inside the recipes directory of your first cookbook, which will serve as your recipe file.
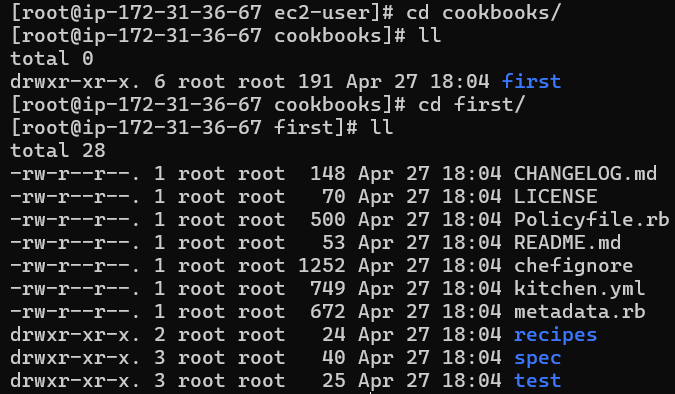
Recipe

Generating Recipe
To edit the first-recipe.rb file using the vi editor, you can use the following command:
vi first/recipes/first-recipe.rb
This command will open the first-recipe.rb file in the vi editor, allowing you to make changes to the recipe.

Press i to enter insert mode in vi.
Copy and paste the following script into the file:
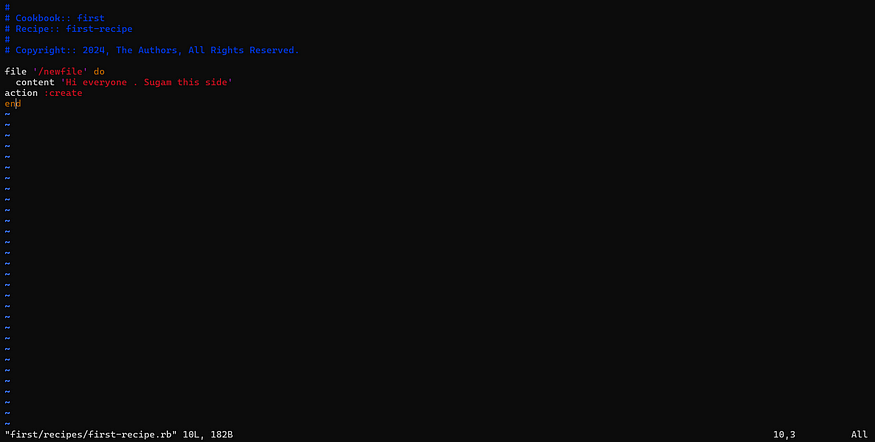
Script File
Press Esc to exit insert mode.
Save the changes and exit vi by typing :wq! and then pressing Enter.
To execute the script and check for any errors using the Chef exec command, you can use the following command:
chef exec ruby -c recipes/first-recipe.rb
This command will use the chef command to execute the Ruby script specified (`recipes/first-recipe.rb`) and check for any syntax errors (`-c` flag). If there are no errors, it will simply return to the command prompt. If there are errors, it will display them in the terminal.

Checking Errors
Now run the recipe first-recipe.rb using chef-client in local mode, using the following command:
chef-client -zr "recipe[first::first-recipe]"
This command executes the first-recipe recipe from the first cookbook in local mode (`-z`). The -r option specifies the run list, which includes the first-recipe recipe.

Executing Chef Script
To check if the Chef run created a new file, you can use the following command:
cat /newfile
This command will display the contents of the newfile, if it was successfully created during the Chef run. If the file was not created or if there was an error, this command will display an error message.

Output
For the purpose of practice, you can create another recipe within your first cookbook and explore additional Chef commands. This will help you become more familiar with the Chef ecosystem and its capabilities. By creating and running multiple recipes, you can gain hands-on experience with Chef's features and deepen your understanding of automation and configuration management.

Secong Recipe

Editing Recipe
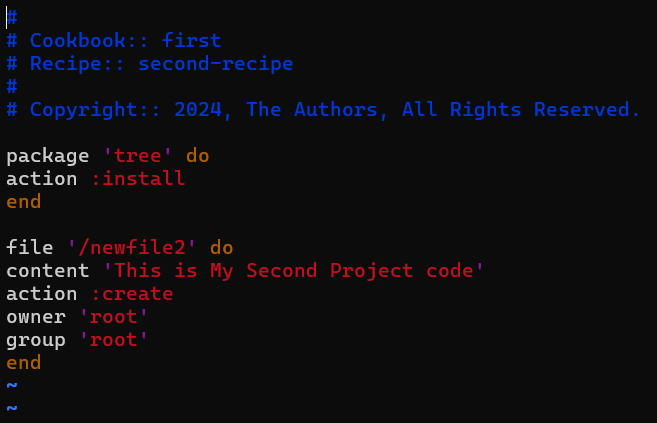
Script
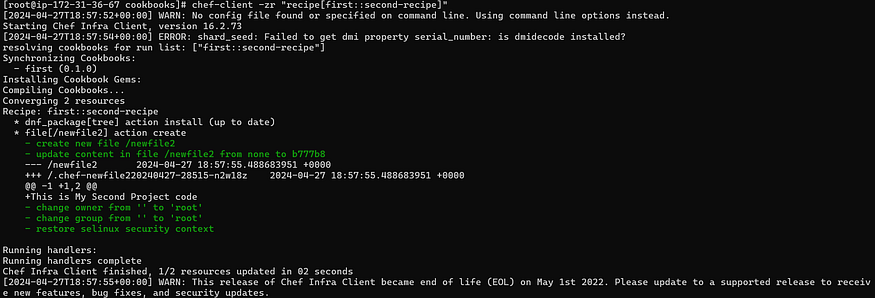
Executing Recipe
Automating Apache Server Setup with Chef
Generate a new cookbook named apache:
chef generate cookbook apache

Creating Apache Cookbook
Change into the apache cookbook directory and generate new recipe:
cd apache
chef generate recipe apache-server

Creating Apache Recipe
Edit the default.rb recipe file to include the recipe for installing and configuring Apache. You can use the vi editor for this:
vi recipes/default.rb
4. Add the following code to the default.rb recipe to install Apache:
#
# Cookbook Name:: apache
# Recipe:: apache-server
# Copyright:: 2024, The Authors, All Rights Reserved.

package 'httpd' do
action :install
end

file '/var/www/html/index.html' do
content 'Hello Everyone'
action :create
end

service 'httpd' do
action [ :enable, :start ]
end
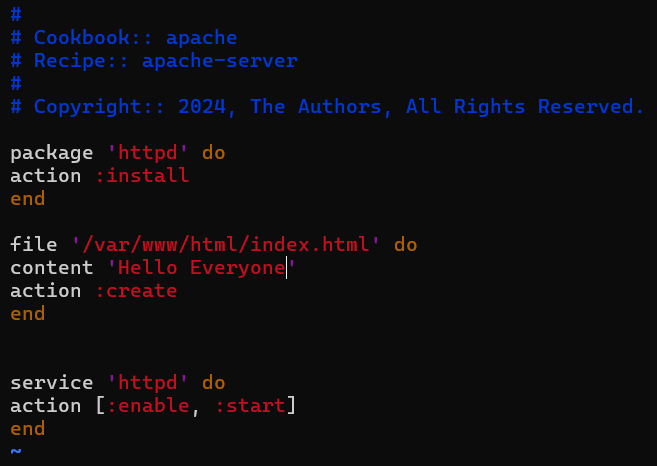
Apache Script File
Save and exit the vi editor (`:!wq`)
Check the script as shown below

Checking Syntax of Apache Recipe
Run the cookbook to install and configure Apache:
chef-client -zr "recipe[apache::apache-server]"
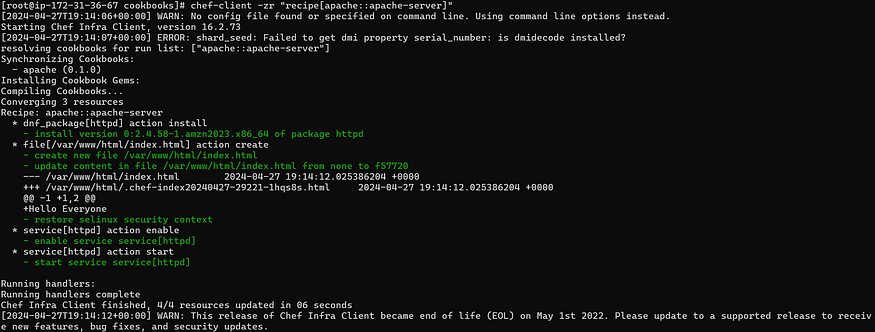
Executing Apache Recipe
This will run the default recipe from the apache cookbook and install Apache on your system.
You can check if the Apache server is working by copying the public IP address of your EC2 instance and opening it in your web browser.

Web Browser with Apache Server
Conclusion
In conclusion, Chef is a powerful tool for automating the configuration and management of your infrastructure. By following the steps outlined in this guide, you can easily set up Chef on your EC2 instance, create cookbooks and recipes to define your infrastructure as code, and automate the setup of services like Apache Server. This approach not only saves time and reduces errors but also ensures consistency across your environment. Start using Chef today to simplify your infrastructure management and scale your operations efficiently.
Thank you for taking the time to read my blog. Your feedback is immensely valuable to me. Please feel free to share your thoughts and suggestions
