Optimizing Code Quality with SonarQube on AWS EC2 Ubuntu: Elevating Static Code Analysis to Ensure Flawless Software Performance — Locally


Performing static code analysis locally on an AWS EC2 instance running Ubuntu allows for a comprehensive examination of code quality and potential issues. By leveraging the power of SonarQube, developers can gain valuable insights into their codebase, including identifying bugs, security vulnerabilities, and areas for improvement. This setup offers a flexible and scalable solution for ensuring code quality in a cloud environment, enhancing the overall reliability and maintainability of software projects.
Static Code Analysis
Introduction :
Unlocking the power of code analysis, imagine seamlessly running SonarQube on our AWS EC2 instance with Ubuntu, right from our local setup. This dynamic configuration empowers developers to delve deep into their code, unveiling hidden bugs, security loopholes, and areas ripe for enhancement. With this innovative approach, wecan fortify our software projects, enhancing their reliability and maintainability. Join the league of forward-thinking developers leveraging the cloud for unparalleled code quality control.
NOTE :
Before embarking on this journey, ensure you have set up SonarQube on our AWS EC2 instance using the comprehensive guide provided in the link below:
[Installing and Configuring SonarQube on AWS EC2: A Step-by-Step Guide](https://medium.com/@sugam.arora23/installing-and-configuring-sonarqube-on-aws-ec2-a-step-by-step-guide-defd8955eb30)This guide will walk you through the process, ensuring you’re ready to unleash the power of SonarQube for top-notch code analysis on your cloud setup.
Step 1 : Visit the SonarQube portal and begin creating your project
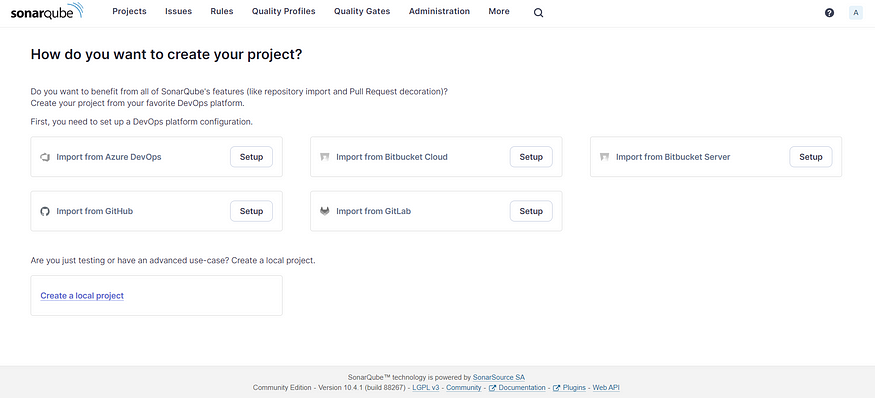
Step 2 : Embark on Quality: Creating Your Project in SonarQube
To create a project in SonarQube, visit the SonarQube portal and navigate to the project creation section.
Click on “Create Project” and then choose “Local Project.”
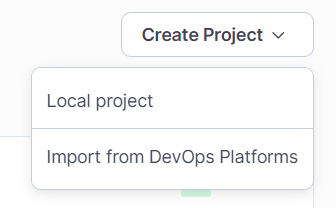
Create Project
Step 3 : Project Details for Superior Analysis
Please provide the project display name and project key. Ensure that the selected branch is “main.”
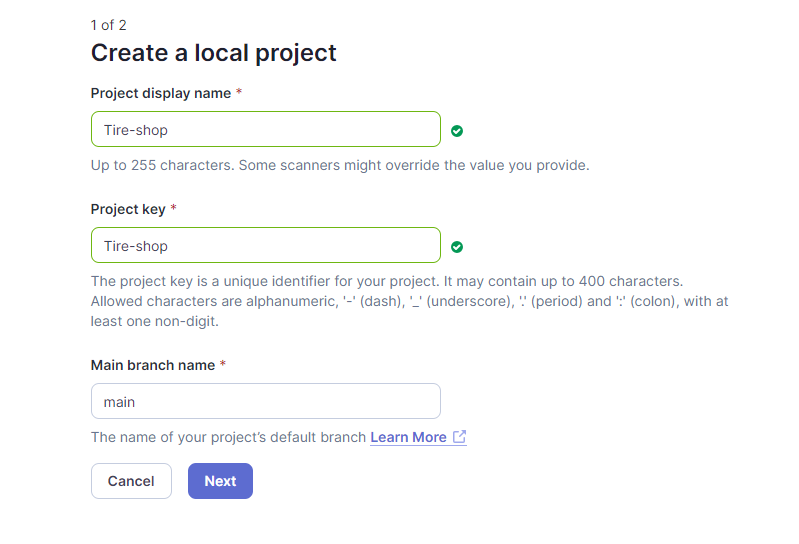
Project Details
Step 4 : Navigating Global Settings: Creating Your Project with SonarQube
If you don’t have any specified settings, then proceed to the global settings and create your project.
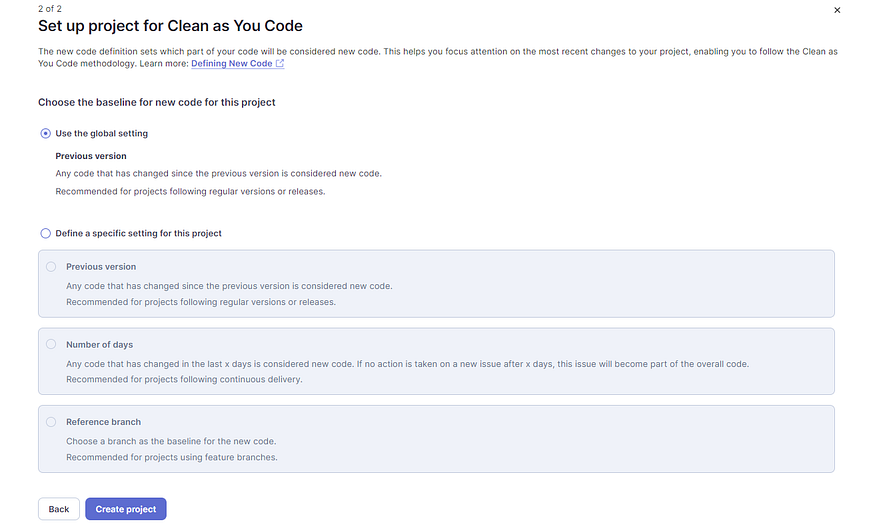
Global Settings
Step 5 : Token Management: Seamlessly Access SonarQube with Generated Tokens
If you already have a token, enter it in the “Token Name” section. If not, generate a token and copy the created token.

Generating token

Generated token
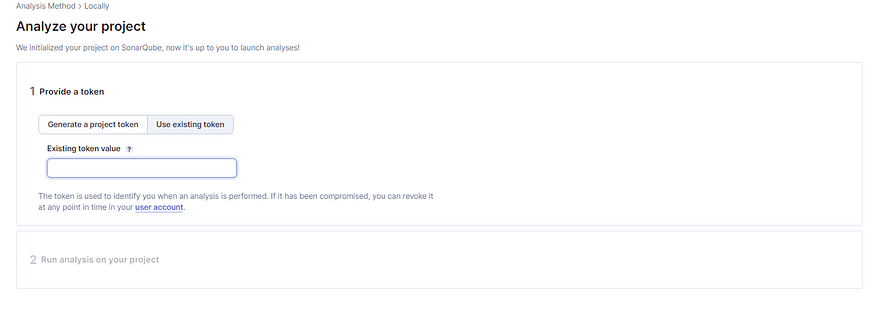
Existing Token
Step 6 : Maven Integration: Running Analysis on Your Project
Since your application is Maven-based, click on “Maven” to run the analysis on your project. Then, copy the command provided below.
mvn clean verify sonar:sonar \
  -Dsonar.projectKey=Tire-shop \
  -Dsonar.projectName='Tire-shop' \
  -Dsonar.host.url=http://3.110.195.178:9000 \
  -Dsonar.token=sqp_61643708deac1f25937315ccce7a2df26385fb23
Step 7 : Returning to the Terminal: Installing Maven on Your EC2 Instance
Now, return to the terminal where you have SSH into your EC2 instance. To install Maven on your EC2 instance, you can use the package manager specific to your Linux distribution. For example, on Ubuntu, you would use apt:
sudo apt update
sudo apt install maven
After installation, you can check the Maven version using the following command:
mvn -version
This will display the installed Maven version and other relevant information.
Step 8 : Git Cloning: Bringing application to our EC2 Instance
To clone the repository https://github.com/ahmedJamaal/Tire-shop.git to our EC2 instance, use the following command:
git clone https://github.com/ahmedJamaal/Tire-shop.git
This command will download the repository to our current directory on the EC2 instance.
Navigate to the Tire-shop directory using the cd command:
cd Tire-shop
Once you’re in the correct directory, paste the Maven command you copied earlier to run the analysis on your project.
mvn clean verify sonar:sonar \
  -Dsonar.projectKey=Tire-shop \
  -Dsonar.projectName='Tire-shop' \
  -Dsonar.host.url=http://3.110.195.178:9000 \
  -Dsonar.token=sqp_61643708deac1f25937315ccce7a2df26385fb23
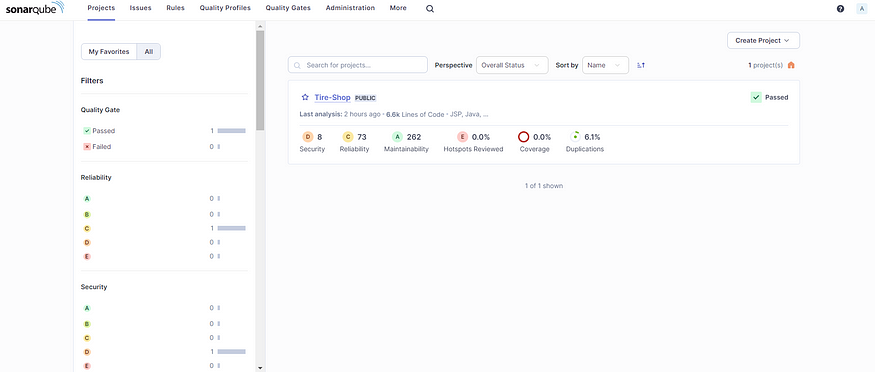
Step 9 : Seamless Integration: Automated SonarQube Updates Reflecting Your Project’s Analysis
If the connection is successful, the SonarQube page should automatically update to reflect the analysis results of your project.
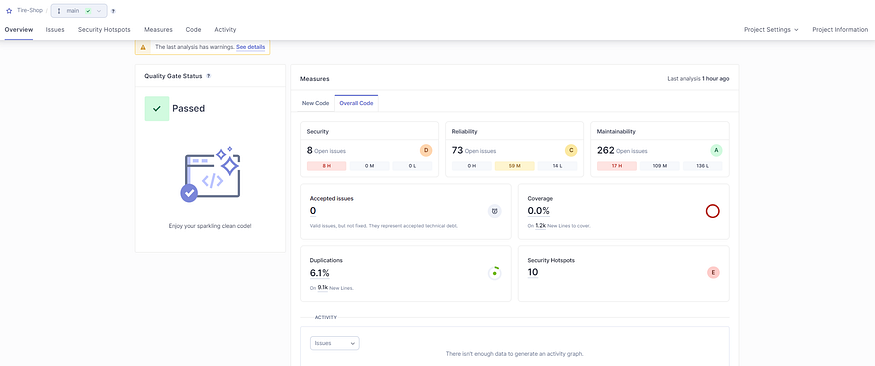
Overview
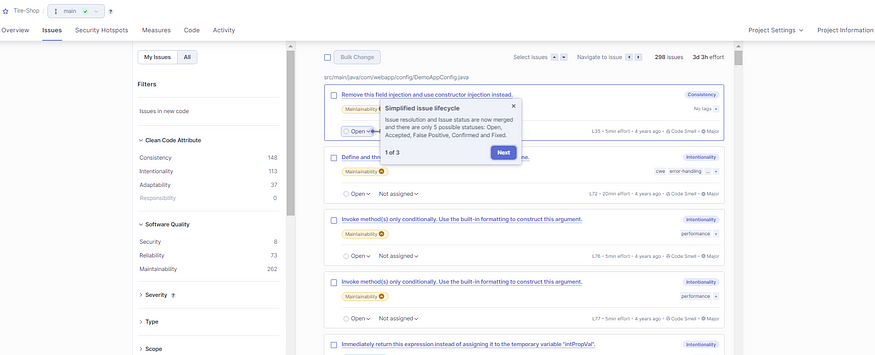
Issues in Project

Security Hotspots
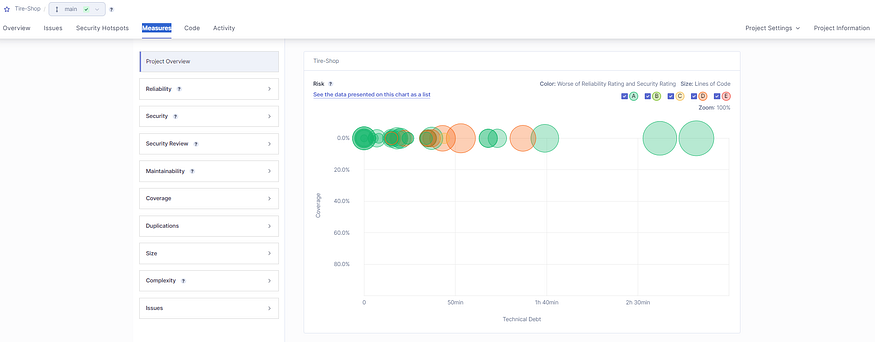
Code Measures
Congratulations! Your project is now successfully connected to SonarQube, allowing you to perform static code analysis effortlessly.
Conclusion :
In wrapping up, our successful integration with SonarQube marks a significant milestone in our project’s journey. With its robust analysis capabilities, SonarQube empowers us to drive our code quality to new heights, ensuring our software remains resilient and dependable.
Thank you for taking the time to read my blog. Your feedback is immensely valuable to me. Please feel free to share your thoughts and suggestions.


